How to install GTM on Shopify without breaking checkout
GTM Shopify setups break checkout more often than any other tracking install we audit, and the failure usually shows up two weeks late as a 30 to 50% drop in reported Purchase events with no obvious cause. The reason is structural. Shopify ships three separate page contexts (storefront, classic checkout, Checkout Extensibility on Plus), and a GTM container that fires cleanly on the storefront often misfires or gets blocked entirely on the checkout pages where the actual money moves. Stores on the basic plan cannot edit checkout.liquid at all, so any tag that needs to fire on the order confirmation page has to come through the Customer Events API or Additional Scripts, both of which have their own gotchas. Most "shopify gtm setup" guides skip the checkout side entirely and pretend a single <script> tag in theme.liquid is the whole job. It is not. The five sections below cover the parts that actually break things.
- Install GTM in `theme.liquid` head, not body. Shopify's async loader needs the head slot.
- Plus stores: use Customer Events for checkout, never paste GTM into `checkout.liquid`.
- Additional Scripts only fires post-purchase, not during checkout. Critical distinction.
- Wire Consent Mode v2 before GTM loads, or every default-denied event silently drops.
What GTM on Shopify actually buys you
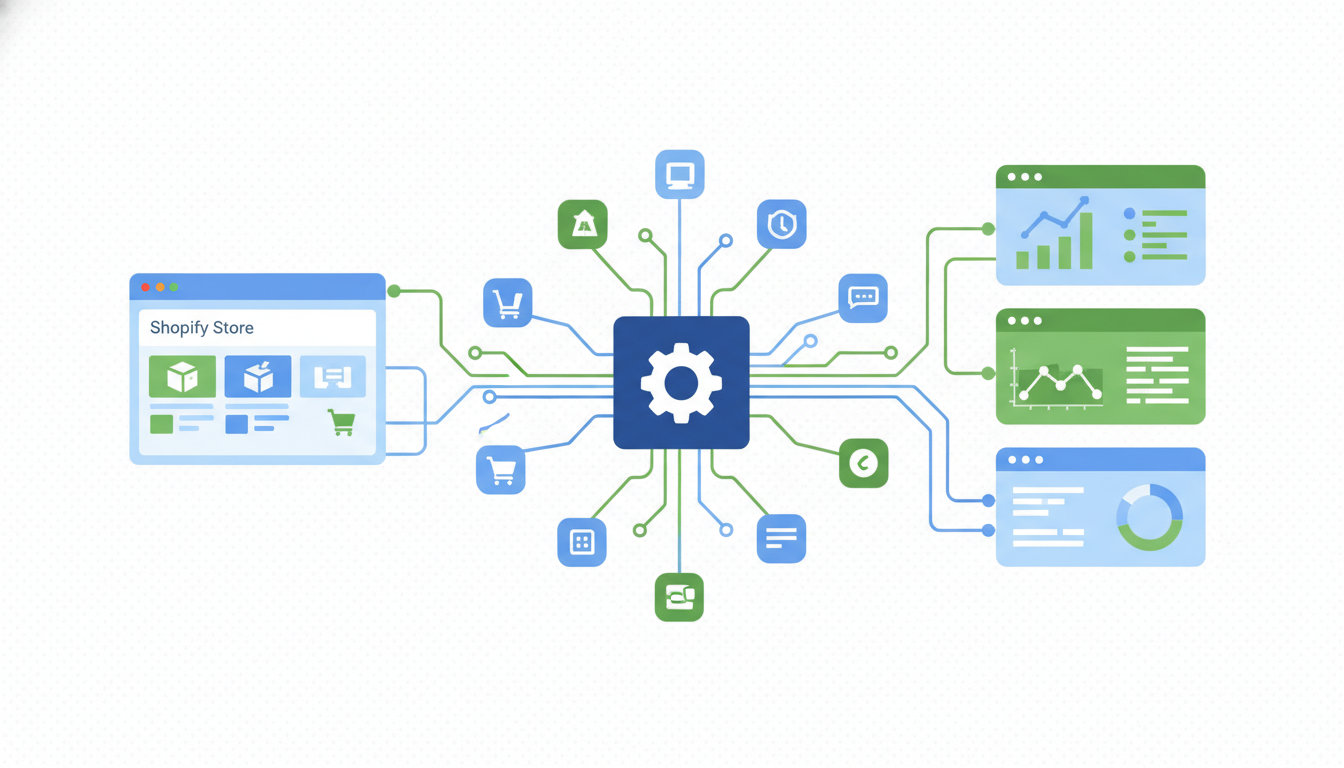
Google Tag Manager Shopify installs give you one thing the native Shopify integrations cannot: a single container where every marketing tag (GA4, Meta Pixel, TikTok Pixel, Bing UET, Pinterest, Reddit, Snap) loads through one wrapper instead of six independent script injections fighting each other in theme.liquid. That is the whole pitch. One container, one set of triggers, one place to debug. When you have three or more pixels active, GTM Shopify pays for itself in the first month just by killing the script bloat that tanks Lighthouse scores and adds 400ms to time-to-interactive on mobile.
The short version: if you run only GA4 and the Meta pixel, the native Shopify channels handle both of them better than GTM does. You do not need a container. If you run four or more tracking platforms, or if you need custom event triggers (button clicks, scroll depth, form interactions, video plays), GTM is the right call because the alternative is six teams editing your theme files at the same time and breaking each other's tags every Friday.
What GTM does not give you: a magic fix for Shopify's checkout architecture. The checkout pages run on Shopify's servers, not yours, and the rules for what you can inject into them depend on your plan tier. That is where most "google tag manager shopify" tutorials go quiet, because the answer is messy. The next section covers exactly why.
Why Shopify plus GTM breaks more often than any other platform
We audit roughly 40 Shopify stores a month. The pattern on GTM installs is consistent enough to predict before we even open the container. About 7 in 10 GTM Shopify setups have at least one of these problems baked in:
- GTM pasted into
theme.liquidbody instead of head, so the container loads after the page paints. Tags fire late, some events miss the data layer entirely. - A tag that should fire on the order confirmation page is wired to a Page View trigger, but on Shopify Plus with Checkout Extensibility, the order confirmation page is a different rendering context and Page View never fires there.
- The Meta pixel installed both in GTM and through the Shopify Facebook and Instagram app at the same time, double-firing every event and inflating reported ROAS by 60%.
- Consent Mode v2 was enabled inside GTM but the consent banner script loads after GTM, so every visitor starts with default-denied state and most marketing tags get blocked silently.
- A
dataLayer.pushwritten for the storefront product page expectsecommerce.itemsbut Shopify's checkout extension passeslineItems, so the GA4 Purchase event arrives with an empty items array.
None of these surface in Shopify reporting. Most of them do not even surface in GTM Preview mode unless you specifically test the order confirmation page on a real purchase. That is why stores ship a "fixed" GTM install on Monday and watch reported conversions drop 40% by Friday with nobody able to point at what went wrong.
The root cause is that Shopify's three page contexts (storefront, classic checkout, Checkout Extensibility) are not the same environment, and GTM was designed for a single environment. Every workaround Shopify has shipped since 2023 (Customer Events, Web Pixels API, Checkout Extensibility) is them admitting the same thing: you cannot run a single GTM container across the whole funnel without paying attention to where each tag actually needs to fire. The Shopify checkout side is where most installs leak.
Best to map the tag-by-tag firing surface before installing anything. Which tags need storefront only. Which tags need checkout. Which tags need post-purchase. Three lists, written down, before you touch the container.
Installing GTM on a standard Shopify theme
This section covers stores on Basic, Shopify, or Advanced plans (not Plus). On these tiers you cannot edit checkout.liquid, so GTM only runs on the storefront and on the post-purchase order confirmation page through Additional Scripts (covered in section 5). The install sequence:
- Open Shopify admin, go to Online Store, then Themes. Click Actions on your live theme, then Edit code.
- Open
layout/theme.liquid. Find the<head>tag (line 5 to 15 on most themes). - Paste your GTM container snippet immediately after the opening
<head>tag, not at the bottom. The container needs to load early so the data layer is initialized before any other script fires. - Open
theme.liquidagain, find the opening<body>tag, paste the GTM<noscript>snippet immediately after it. - Save. Open your store in an incognito window. Open GTM Preview mode and confirm the container fires on Page View.
That is the easy part. Where the install actually breaks for most stores is the data layer. Shopify does not push standard GA4 or Meta-compatible ecommerce events into dataLayer automatically. You either write the pushes yourself in theme.liquid for each event (View Item, Add to Cart, View Cart, Begin Checkout) or you install a third-party app like Analyzify or Elevar that does it for you. If you skip this step, GTM fires the container but every ecommerce tag runs with ecommerce: undefined, which means GA4 attributes the event to "Unknown" and Meta drops it entirely.
The cleanest path for stores under $50k a month in revenue: pay for Elevar's or Analyzify's data layer install (around $300 a month), wire your tags through their pushes, and skip the dev work. The cleanest path above $50k a month: hire a senior Shopify dev for two days, write the data layer yourself in theme.liquid and templates/product.liquid, and own the code. Both work. The middle path (writing the data layer yourself with a junior dev or no dev) is where most stores ship a broken install and discover it three weeks later.
Installing GTM on Shopify Plus with Checkout Extensibility
Shopify Plus changes the rules. As of August 2024, Shopify stopped accepting checkout.liquid edits for new Plus stores and has been migrating existing stores to Checkout Extensibility. By the deadline (extended to August 2025 for most accounts), every Plus store runs the new checkout, which means the entire approach to checkout-side tracking changed. You cannot paste a <script> tag into checkout.liquid anymore. The file effectively does not exist.
What replaces it is the Customer Events API (formerly the Web Pixels API). Customer Events let you register a sandboxed pixel inside Shopify admin under Settings, then Customer Events. The pixel runs in an isolated iframe context that Shopify provides, with access to events like checkout_started, payment_info_submitted, and checkout_completed. The trade is isolation. Your Customer Events pixel cannot read cookies from the parent context, cannot write to the global dataLayer, and cannot fire arbitrary GTM tags. It can only send events through the platforms it has been registered with (GA4 directly, Meta directly, or a custom JavaScript pixel that calls a CAPI endpoint).
This is the part of "shopify gtm checkout" that catches every operator off guard the first time. GTM does not natively run inside Customer Events. You can register the GTM snippet as a Custom pixel inside Customer Events, and Shopify will load it, but the data layer pushes you write inside that snippet only fire inside the sandboxed checkout context. They do not communicate with the GTM container running on the storefront. You are running two separate GTM containers in practice (one for storefront, one for checkout), or you are accepting that checkout-side tags fire through Shopify's native channels and not through GTM at all.
The decision tree we run on every Plus client:
- If you only need GA4 and Meta on checkout, register them through Settings, Customer Events, and use Shopify's native pixel options. No GTM needed for checkout. Cleaner, fewer moving parts.
- If you need TikTok, Pinterest, Bing, or any other pixel on checkout, register a Custom pixel inside Customer Events with a small JavaScript snippet that calls each platform's API directly. Skip GTM here.
- If you need a single GTM container managing both storefront and checkout (rare, usually for agencies running 20+ tags), register GTM as a Custom pixel and accept that you are running parallel containers. Document the split clearly or your next agency will spend a week figuring out why two containers exist.
Shopify's Custom Pixels documentation walks the registration step by step. The hard part is not the registration. The hard part is deciding before you register whether the storefront container and the checkout container should be the same container ID or different ones. Most operators default to "same" because it sounds simpler, then spend three weeks debugging why their storefront triggers fire on checkout and break things. Different containers, with clear naming, is almost always the right call.
The Additional Scripts trap and how to avoid it
Additional Scripts is the field at Settings, Checkout, Order status page in Shopify admin. It looks like a place to put GTM. It is not, and putting GTM there is one of the most common reasons we see broken Plus and pre-extensibility installs.
Two facts about Additional Scripts that almost nobody documents clearly:
- Additional Scripts only fires on the order confirmation page (the "thank you" page after checkout completes). It does not fire on the contact information, shipping, or payment steps. Tags that need to fire mid-checkout will silently never fire if installed here.
- On Shopify Plus stores migrated to Checkout Extensibility, Additional Scripts has been deprecated. The field still exists in some accounts during the migration window, but Shopify has stated it will be removed entirely. Tags installed there will stop firing without warning.
What Additional Scripts is actually for: a Purchase event firing on the thank you page, with order details available through the Shopify.checkout object. That is the original design intent. People installed GTM there because it seemed convenient, but the trigger surface is wrong (Page View on the thank you page, not Page View on every checkout step) and the deprecation timeline makes it a dead-end.
The trap most stores fall into: a developer pastes the GTM container snippet into Additional Scripts thinking it will cover the checkout flow, and it loads cleanly on the thank you page. Reported Purchase events look fine for the first week. Then a few months later somebody asks "why is our Begin Checkout count 80% lower than Add to Cart?" and the answer is that Begin Checkout was never firing because GTM never loaded on the checkout steps. Additional Scripts only sees the post-purchase page.
Best to use Additional Scripts only for a hardcoded Purchase event tag (Meta Pixel Purchase, GA4 purchase event, conversion pixel for whatever ad platform), and only on stores that are not yet on Checkout Extensibility. For everything else (mid-checkout events, Plus stores), use Customer Events. If you are on a basic Shopify plan and need mid-checkout tracking, the honest answer is that you cannot have it. Shopify designed the basic checkout to be unmodifiable. Live with the gap or upgrade the plan.
Consent Mode v2 and GTM: the right order to wire them
Google's Consent Mode v2 became mandatory in March 2024 for any site running Google Ads or GA4 to EEA traffic, and the enforcement tightened in 2025 with broader checks across analytics tags. The wiring on Shopify trips up almost every GTM install because the order of script loads matters and Shopify gives you very little control over that order.
The rule in one line: your consent banner script must load and set initial consent state before GTM loads. If GTM loads first, every tag inside it sees the default state (which should be "denied" for everything except security), and the consent update from your banner arrives too late to reactivate them. The user clicks "accept all" and nothing changes because the tags already evaluated their consent state at firing time.
The clean wiring sequence for Shopify:
- Install your consent banner script (Cookiebot, Iubenda, Klaro, or your own implementation) in
theme.liquidhead, BEFORE the GTM snippet. Order matters. The banner script needs to register itsgtag('consent', 'default', {...})call before GTM evaluates anything. - Inside GTM, set up a Consent Initialization trigger and use it on every consent-aware tag. GA4 and Google Ads tags handle this natively. Meta, TikTok, and other platforms need a custom consent check inside the tag template or a wrapper trigger.
- For Shopify Plus stores, the consent banner also needs to fire inside Customer Events for the checkout context. Most banner scripts do not handle this automatically. Either pick a banner that supports Shopify Plus checkout (Cookiebot does, Klaro requires custom work) or accept that checkout pages run with default consent state.
- Test by opening DevTools, clearing cookies, loading the store, and watching the order of script tags in the Network panel. Consent banner first, GTM second. If GTM appears first, the order is wrong and the install will fail consent audits.
Google's Consent Mode documentation covers the parameters in detail. The Shopify-specific gotcha that the docs do not cover: Shopify's own native channels (the GA4 channel, the Facebook and Instagram app) handle Consent Mode automatically through their own consent integration, but they do not coordinate with your GTM consent state. So if you run a tag in both places (a common bad practice), one copy respects consent and the other does not. Pick one source per tag. Document the choice.
For Plus stores running both a storefront GTM container and a separate Customer Events pixel, you need to ensure consent state is consistent across both contexts. Customer Events runs in an iframe with no shared cookie access, so the consent banner has to write a Shopify-readable cookie or use the analytics.publish API to broadcast consent state into the sandboxed checkout. This is the most fragile part of the whole stack. Test it on a real purchase, on a real EEA IP (use a VPN), with a fresh incognito window, before pushing live.
Validating GTM is firing cleanly without breaking checkout
Never push a GTM Shopify change live without validation. The cost of skipping this step is two to three weeks of broken tracking before anyone notices, by which point your reported ROAS, attributed conversions, and audience signals are all polluted. The validation sequence we run on every client install:
- Enable GTM Preview mode on the storefront. Walk through View Item, Add to Cart, View Cart, Begin Checkout. Confirm each event fires once with the correct ecommerce payload (item ID, item name, price, quantity all populated, no
undefinedfields). - Use a coupon to drop a real test order to $0.50. Walk through the entire checkout. Confirm Begin Checkout fires on the contact info page. Confirm Add Payment Info fires on the payment step. Confirm Purchase fires on the thank you page.
- On Plus stores, open DevTools on the checkout pages, switch to the Console tab, and verify that the Customer Events pixel registered correctly by typing
analyticsand confirming the object exists. Ifanalyticsis undefined, the pixel did not load. - In GA4 DebugView, watch the events arrive in real time during step 2. Every event should have transaction_id (on Purchase), correct currency, correct items array. If items is empty, the data layer push is broken on that event.
- In Meta Events Manager, open Test Events and run the same test purchase. Confirm both browser and server events fire (if running CAPI through GTM), with matching event_id for dedup.
- Repeat the entire test from a different browser, on a real mobile device on cellular (not WiFi), and one more time after clearing all cookies. Three clean runs minimum before you call the install validated.
The single most common failure mode in step 6 is the cellular run. A tag that fires perfectly on desktop and on mobile WiFi sometimes fails on cellular because of timing differences in how the page loads, or because of a slow third-party script that finishes after the GTM trigger evaluates. If your Begin Checkout event fires 95% of the time on desktop and 60% on cellular, the issue is almost always a timing race condition in your GTM trigger configuration, not a tag-level bug.
For Shopify GTM checkout specifically, there is no Preview mode that works inside Customer Events on Plus. The pixel sandbox does not expose itself to GTM Preview. The only way to validate Customer Events tags is real test purchases watching the Network tab in DevTools and confirming the outbound request to GA4 or Meta fires with the right payload. This is annoying. There is no shortcut.
Frequently asked questions
Where exactly should I put the GTM container code on Shopify?
layout/theme.liquid. Paste the GTM head snippet immediately after the opening <head> tag, not at the end of the head section. Paste the <noscript> snippet immediately after the opening <body> tag. Save. The order matters because Shopify themes load multiple scripts in the head, and GTM needs to initialize the data layer before any other script can push to it. If you paste GTM at the bottom of the head, you will see late-firing tags and missing pageview events on slower connections, especially mobile cellular.Why does my GA4 Purchase event fire on the thank you page but not anywhere else in checkout?
theme.liquid (storefront) and Additional Scripts (thank you page). Neither covers the actual checkout steps. On a basic Shopify plan, you cannot fix this because Shopify does not allow custom scripts mid-checkout. On Plus with Checkout Extensibility, you fix it by registering a Customer Events pixel that fires on checkout_started and payment_info_submitted. If you are on Plus and still on classic checkout.liquid (some legacy accounts have it through August 2025), you can paste GTM into checkout.liquid, but you should be migrating to Extensibility instead.Should I use GTM or Shopify's native Facebook and Instagram app for the Meta pixel?
What is the difference between the Customer Events API and Additional Scripts on Shopify?
checkout_started, payment_info_submitted, and checkout_completed. It is required on Shopify Plus stores using Checkout Extensibility. Additional Scripts is the older field that only fires on the post-purchase order confirmation page, has no access to mid-checkout events, and is being deprecated on Plus. If you are starting fresh on any Shopify plan in 2026, use Customer Events for anything checkout-related and skip Additional Scripts entirely. The naming is confusing but the difference matters.How do I make sure GTM works with Consent Mode v2 on a Shopify store in the EU?
theme.liquid head BEFORE the GTM snippet. The order matters because the banner needs to set default consent state before GTM loads any tag. Second, inside GTM, attach the Consent Initialization trigger to every consent-aware tag, and add custom consent checks for non-Google tags like Meta and TikTok. Third, on Plus stores, ensure your banner also fires inside the Customer Events checkout context, which most banners do not handle automatically. Cookiebot supports it natively. Test on a fresh incognito window with a VPN to an EEA IP and watch the Network panel for the script load order.Can I use a single GTM container for both storefront and checkout on Shopify Plus?
GTM Shopify done well is invisible. Tags fire on time, events arrive cleanly, consent state propagates without anyone thinking about it, and the marketing team forgets the container is even there. GTM Shopify done poorly is a slow leak that nobody notices for three weeks until the agency reviews attribution and asks why Begin Checkout is suddenly 80% lower than Add to Cart. The difference between the two is mostly the order in which you do the install, and whether you treated checkout.liquid, Additional Scripts, and Customer Events as three different things instead of one. They are three different things. Best to walk the audit checklist above end to end before you ship any changes to a Plus store, and start with mapping the storefront, checkout, and post-purchase tag surfaces on paper before you open the container at all. Most "GTM is broken" tickets we get from new clients turn out to be GTM working exactly as configured, just configured for the wrong page context. Pick the right context first. The container is the easy part.
Get a full X-ray of your ad account
Paste your Meta and Google Ads. See exactly where signal is leaking. Free. 60 seconds.